As part of tracking the warpath of William Wallace, this article looks at the strategic importance of Stirling.
In the conquest and defense of Scotland, there is no location more important than Stirling where Wallace (d. 1305) and Andrew Murray (d. 1297) made their successful stand against the invading English in 1297.
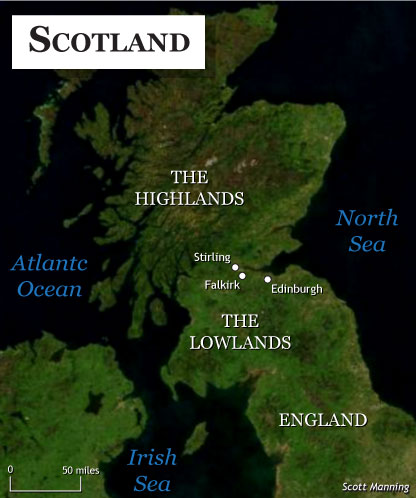
Scotland is what Sun Tzu would classify as “difficult ground.” ((Sun Tzu, The Art of War, XI.8. This translation comes from the Samuel B. Griffith translation (London: Oxford University Press, 1971.)) The numerous lakes, swamps, marshes, forests, and mountains will overwhelm any visitor. The northern half, or the Highlands, is much more rugged than the south, the Lowlands, and even today, cars rely on single-lane, dirt roads and few bridges to get around the massive lakes, or lochs, as the Scottish call them. When heavy rains come, lakes often flood and cover portions of the small roads wrapping around them. Drivers find themselves with the unsettling choice of gunning the car through the water or backing up 10-20 miles from whence they came. The west coast is pleasant and scenic, but the east coast, especially in the northern parts, suffers from harsh winds that sting unexposed skin. ((This description of Scotland’s geography comes from the author’s three-week drive through the country in the summer of 2011.)) Difficult ground indeed.
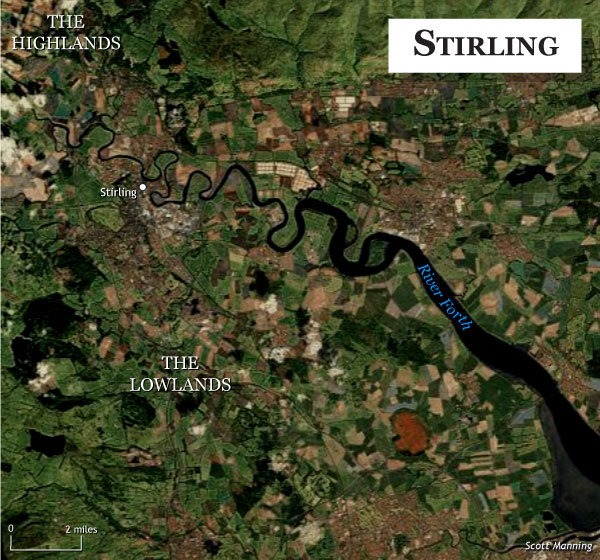
Acting as a natural barrier between the Highlands and the Lowlands is a winding river called Forth. Starting in Loch Ard in the Highlands, the Forth moves east and then southeast continually looping around geographical obstacles and eventually emptying into the North Sea. The river is typically too deep to ford. The lowest point of the river is at a town called Stirling. ((Michael Prestwich, “The Battle of Stirling Bridge: An English Perspective” in The Wallace Book, ed. Edward J. Cowan, 64-76 (Edinburgh: John Donald, 2007), 65.))
Historians are unanimous in their appraisal of Stirling’s importance. One recent historian describes it as “the key which would unlock the two halves of Scotland.” ((G. W. S. Barrow, Robert Bruce and the Community of the Realm of Scotland (Edinburgh: Edinburgh University Press, 2005), 113.)) Another describes it as “the strap that held the north and south of Scotland together.” ((John France, Western Warfare in the Age of the Crusades, 1000-1300 (Ithaca: Cornell University Press, 1999), 174.)) Finally, a third describes it as “vital strategic spot” and without control of its castle, “the Scots could move about freely” in the north. ((Fiona J. Watson, Under the Hammer: Edward I and Scotland, 1286-1307 (East Linton: Tuckwell Press, 1998), 167, 200.)) Although these historians are speaking about the thirteenth-century, these are accurate descriptions for roughly 2000 years of Scottish history. Today, visitors will find a small town with a castle and bridge—similar features that existed in 1297. Going even further back, there is evidence that the Romans built a bridge at this location during Agricola’s reign as governor of Britain (r. 78-84), testifying to its enduring significance. ((Boece wrote about Agricola’s bridge building at Stirling in 1527. Ronald Page, “The Ancient Bridge of Stirling: Investigations 1988-2000,” Scottish Archaeological Journal 23, no. 2 (2001): 142.)) Unable to hold onto the territory north of Stirling, the Romans eventually built Antonine Wall in 142, south of the Forth. The wall measured nearly 10 ft high, ran east to west almost parallel of the Forth, and sported 19 forts at roughly 2-mile intervals. The wall was a failed attempt at recreating the natural barrier the Forth already presented, and the Romans abandoned the wall in the early 160s. ((John Gifford and Frank Ameil Walker, The Buildings of Stirling and Central Scotland (New Haven: Yale University Press, 2002), 13, 15.)) During the early Middle Ages (c. 500-1000), Stirling remained hotly contested. One medieval chronicler documents how Kenneth MacAlpin (r. 843-858), king of the Picts, besieged the castle in 842 during his conquest of the region. ((Ibid., 665.)) The same chronicler believes King Osbert (d. 867) also built a bridge at Stirling in the ninth-century. ((Page 2001, 142.))
Stirling remained a hotbed of activity during the high Middle Ages (c. 1000-1300), especially during the Scottish Wars of Independence. When English King Edward I (r. 1272-1307) began his first conquest of Scotland (1296), the Scots abandoned Stirling without a fight. ((Michael Prestwich, Edward I (New Haven: Yale University Press, 1997), 473.)) However, the Scots recaptured it the next year after the Battle of Stirling Bridge, which subsequently resulted in the destruction of said bridge. ((Watson 1998, 67.)) After Edward defeated the Scottish army at Falkirk (1298), he quickly reclaimed Stirling. ((Watson 2007, 35.)) Edward had to fight at Falkirk, a town south of the Forth, because he lacked possession of Stirling, his only means for crossing into the Highlands.
In 1299, after starving out its English garrison, the Scots once again retook Stirling Castle from the English. Unable or unwilling to reclaim it initially, Edward decided to bypass Stirling by building a pontoon bridge in 1300. However, he lacked the funds and was unable to cross the Forth until 1303. After which, his army relied on supplies from his fleet. ((Prestwich 1997, 494, 499-500.)) After securing castles north of the Forth, Edward returned to Stirling in 1304 with roughly 13 siege engines in order to take the castle. ((Peter Purton, A History of the Late Medieval Siege, 1200-1500 (Woodbridge: The Boydell Press, 2010), 87-88.)) Although Edward could bypass Stirling and rely on supplies from the sea, he could not leave the city in enemy possession. Two years later in 1306, Edward repaired the bridge. ((Page 2001, 143.)) In 1315, Scottish King Robert the Bruce (r. 1306-1329) quelled the exchanges for a while by destroying Stirling Castle. ((Barrow 2005, 308.))
During this 20-year period (1296-1315), Stirling changed hands six times while both the castle and bridge met destruction. Through the eighteenth-century, Stirling would see conflict as the English and Scottish fought over its possession until the end of the Jacobite Rebellion in 1746. The town is reminiscent of Acre during the Crusades or the Shenandoah Valley during the American Civil War (1861-1865), both heavily conquered regions, which were strategically vital to both sides in their respective conflicts.
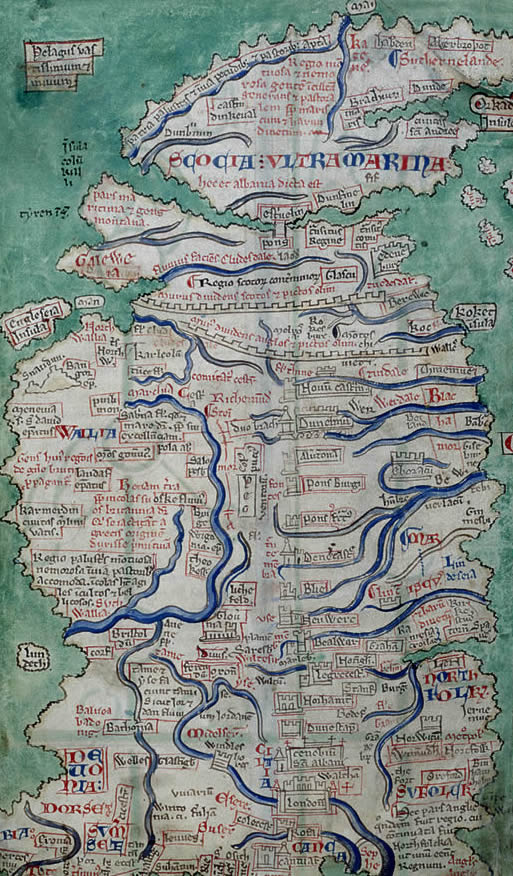
A thirteenth-century map of Britain (see below) provides a glimpse of how the medieval mind viewed Stirling. Its author, Matthew Paris (1200-1259), obviously lacked geographical precision, but he reveals a medieval perspective of the land. Northern Scotland appears as a disconnected island, separated by the River Forth from the Lowlands and only connected by a bridge at Stirling. Although exaggerated, the map visually depicts the strategic importance of the town.
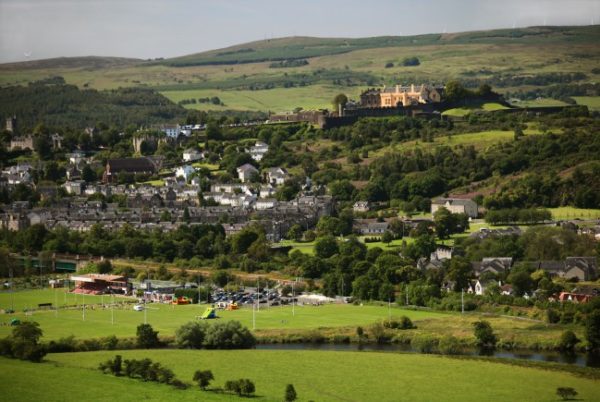
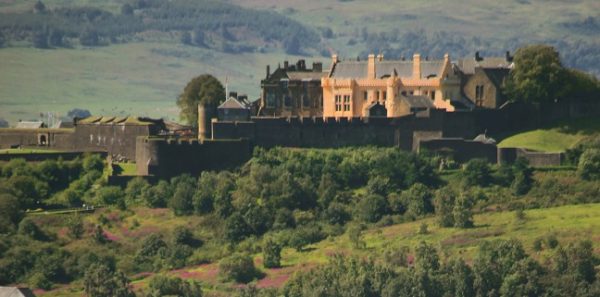
Given its natural chokepoint, Sun Tzu would identify Stirling as “key ground,” because it is “equally advantageous” for both armies to occupy. ((Sun Tzu, XI.4.)) A half mile south of the Forth sits Stirling Castle on a high, defensible ridge. This is an ideal spot for defending against crossing armies in the north. Likewise, another ridge, the Abbey Craig, sits one mile to the north of the river. In 1297, Wallace and his co-leader, Murray, selected Stirling as the spot to confront the English that arrived with an army to respond to a growing Scottish rebellion. When they heard of the English army’s approach, they abandoned a siege of Dundee in the north. Their selection of Stirling was a clear, strategic choice that would lead to an unlikely victory of the Scots over the English.
Bibliography
Barrow, G. W. S. Robert Bruce and the Community of the Realm of Scotland. Edinburgh: Edinburgh University Press, 2005.
Cowan, Edward J., ed. The Wallace Book. Edinburgh: John Donald, 2007.
France, John. Western Warfare in the Age of the Crusades, 1000-1300. Ithaca: Cornell University Press, 1999.
Gifford, John and Frank Ameil Walker. The Buildings of Stirling and Central Scotland. New Haven: Yale University Press, 2002.
Page, Ronald. “The Ancient Bridge of Stirling: Investigations 1988-2000.” Scottish Archaeological Journal 23, no. 2 (2001): 141-165.
Prestwich, Michael. Edward I. New Haven: Yale University Press, 1997.
Purton, Peter. A History of the Late Medieval Siege, 1200-1500. Woodbridge: The Boydell Press, 2010.
Sun Tzu. The Art of War. Translated by Samuel B. Griffith. London: Oxford University Press, 1971.
Watson, Fiona J. Under the Hammer: Edward I and Scotland, 1286-1307. East Linton: Tuckwell Press, 1998.
